how to dry & Store Your Herbs
preserve all that homegrown goodness!
What to do when your garden is overflowing with fresh herbs? Dry some.
Then dry some more! Start your personal "stash" of homegrown herbal tea!!
What's On This Page?
(Click any link to jump straight to that section)
how to dry fresh herbs
My first foray into the wonderful world of at-home herb drying was a real eye-opener!
After much trial and error (more error than I care to admit!), I've learned that some drying methods preserve each herb's true flavor better than others.
There's no such thing as "one size fits all" when you're preserving fresh herbs.
Best Drying Methods for Each Herb
| Open-Air | Oven | Microwave | Dehydrator | |
|---|---|---|---|---|
| Chamomile | Fair | Good | Good (very carefully!) | Good |
| Mints | Good | Good | Good | Good |
| Lemon Verbena | Good | Good | Good | Good |
| Stevia | Good | Good | Good | Good |
| Anise Hyssop - flowers | Good | Good | Poor | Good |
| Anise Hyssop - leaves | Good | Good | Good | Good |
| Lemongrass | Good | Good | Good | Good |
| Rose Hips | Good (small hips only!) | Good | Good | Good |
| Bee Balm - flowers | Good | Fair | Poor | Good |
| Bee Balm - leaves | Good | Good | Good | Good |
| Lavender | Good | Fair | Poor | Good |
| Lemon Balm | Good | Good | Good | Good |
Here are a few things to keep in mind - no matter which preserving method you're using:
- Always start with freshly-picked herbs.
- Resist the temptation to harvest more than you can realistically dry or freeze at one time.
- Be sure your herbs are clean, dry, and free of insect or animal damage.
- Get all your preserving equipment (see below) ready before you head out to the garden to pick your herbs.
How to Open-Air Dry Your Tea Herbs
Are you a patient soul? This is an easy way to dry lots of herbs at one time. But it's definitely not the quickest:
- Cut a handful - or a basketful - of herbs from your garden.
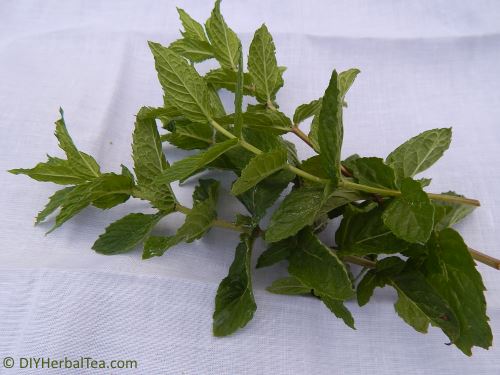
- Strip all leaves from the bottom 1½ inches (3.8 cm) of each stem.

- Gather 5 or 6 stems together in a bunch, and wrap the bunch with a piece of twine, a rubber band, or a twist tie to hold them loosely together.

Hint: I slip a sprung-open paper clip into the bundle to use as a hanging device ...

- Now, hang your herbs in a non-humid, well-ventilated place, away from direct sunlight. (Thank goodness for air-conditioned guest rooms!)

Yep, my herbs are hanging from an over-the-door clothes hook. I was running out of space on the drying lines I had strung across the room. So I was forced to get creative with places to hang more bunches.
- When your herbs feel crunchy-dry, strip them from their stems for storage.

Reminder ...
If you're thinking of hanging your herbs in your garage or basement to dry, think twice about that.
Your basement might be more humid than you realize, leading to moldy herbs. And garages collect some really nasty fumes. You don't want those fumes seeping into your tea herbs. Ick!
Are you short on hanging space? Lay your herbs on a flat surface to dry.
- For larger leaves, wire baking racks are a handy drying tool. The rack allows for good air circulation under, over, and around each leaf.

If your leaves or flowers are small and fall through the holes on a baking rack, spread them out on a clean cloth or paper. They'll dry just fine.
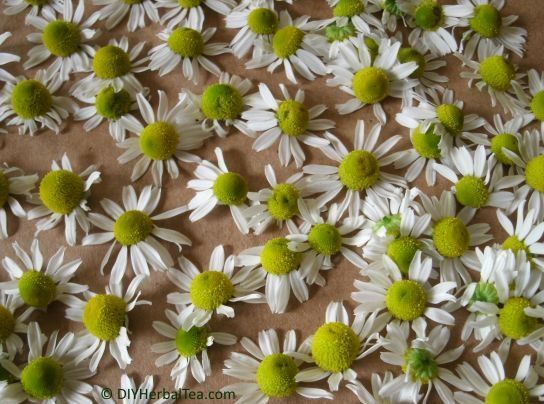
- Leave your herbs in a well-ventilated, humidity-free, shady place to dry.
Important: Check your herbs every day. If you notice any moldiness, or even the barest hint of a musty odor, throw those herbs away and start over with a fresh harvest and less-humid drying conditions!
How to Dry Herbs in Your Oven
The secret to success with this method is having an oven that consistently holds a super-low (90°F /32°C or lower) temperature setting. If your oven temperature spikes and drops, you might want to try a different drying method.
Remember, our herbs are precious! We want to dry 'em - not fry 'em!!
- Pre-heat your oven on its lowest temperature setting. 75-80° F (24-27° C) is perfect.
- Spread your clean, dry herb leaves or flowers on a baking sheet.

- Pop the baking sheet into the oven.
- Leave the oven door slightly ajar to allow some air circulation.
- Check your herbs regularly. As soon as they become crispy to the touch, they're done!
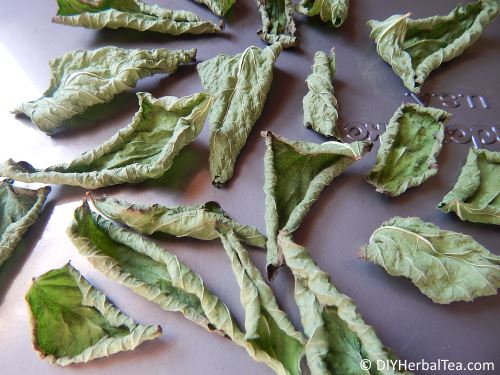
* Helpful Hint: Check the temperature inside your oven before you turn it on.
You might be surprised to find that it's warm enough in there to dry your herbs without ever cranking up the heat!
Drying Herbs in a Microwave
Frankly, I was pretty skeptical about microwave drying herbs. Then I tried it and discovered that many tea herbs hold their true color and flavor surprisingly well when they're dried in the microwave.
The scientific explanation involves the difference in evaporation rates of a plant's water content and its volatile oils (the good stuff!). Borrrrrrrring, I know. So I'll spare you the science mumbo jumbo. ;-)
Moving right along to the "how to" ...
- Set your microwave to the lowest possible power setting.
- Spread your herbs on a clean, white paper towel, and put them in the microwave. Cover loosely with another towel. (The towels helps absorb the moisture that's released from the herbs as they dry.)
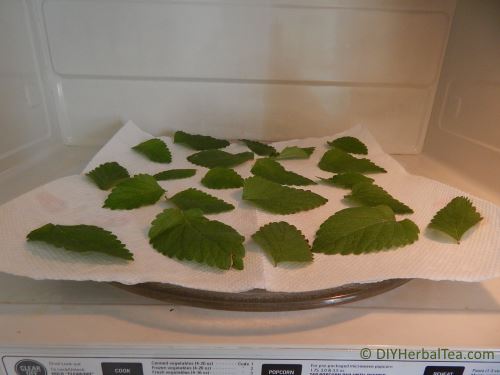
- Press "Start", and zap your herbs for 30-40 seconds.
- Remove the top towel, and let your herbs "air out" for a minute with the microwave door open. Then feel for dryness.
- If your herbs aren't quite dry, zap 'em again for about 20 seconds.
- Repeat this process, using shorter and shorter zapping times, until your herbs are just crispy dry to the touch.
- When they're fully dried and cool, put them into an air-tight container for storage.

* IMPORTANT *
Be extra-careful when microwaving herbs.
In a matter of a few seconds, a delicate flower or leaf can go from perfectly dried, to destroyed, to on fire!
Dehydrating Tea Herbs
During the growing season, my food dehydrator gets more use than any other appliance in my kitchen. Yes, it's true, I'm not big on cooking. ;-) But I can't live without my dehydrator for drying fresh herbs!
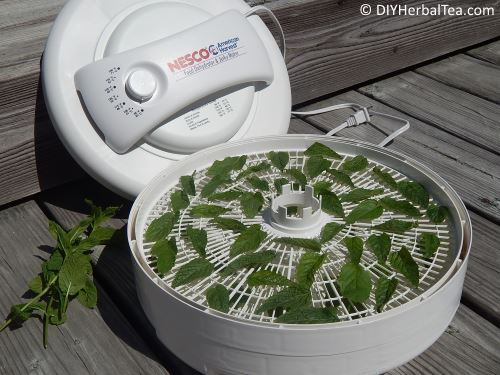 My dehydrator is 7+ years old, and it's still running like a champ!
I load 4 or 5 trays with freshly harvested herbs, turn the trusty machine on to the lowest temperature setting, and walk away.
The drying temperature stays perfectly steady. No heat fluctuations to screw up the process ... and in a matter of hours my herbs are nice and crispy dry.

Note: Each brand of dehydrator operates a little differently. So be sure to follow your manufacturer's instructions for best results!
how to store your dried herbs
Will your homegrown herbal tea taste as fresh in February as it did the day you harvested it? Yes ... if you store your dried herbs properly!
to crush or not to crush
I know how tempting it can be to crush your mint, lemon verbena and other leaves up before you put them into their storage containers. They smell sooooo good when you rub them between your fingers!
And when you buy those expensive herbal teas from a fancy-schmancy tea shoppe, the leaves are already crushed. So that must be the proper way to store them. Right?
Nope! Ask any chef. He or she will tell you that it's best to store your herbs whole. As soon as you crumble them, they begin to lose their potency.
So, do as top chefs do. Keep your herbs whole until you're ready to use them. And store them in a squeaky-clean, completely dry, airtight container.
best storage containers
What's the best material for your storage containers? Glass!
I'm a huge fan of glass Mason jars. They're airtight. They're easy to clean. And they don't "hold odors" from whatever was in them before.
Plus, they're inexpensive. Properly cared for, they'll last forever.
 Part Of My "Stash" From A Recent Harvest
I'm also a huge fan of the cute little "dissolvable" labels I use on my jars!
When it's time to wash and re-use a jar, just run it under water and the label slips right off. No more frustration (or manicure damage!) trying to remove gunky glue residue. :-)
best storage location
Store your herbs is anywhere in your home that's cool, dry and away from direct sunlight.
- Inside a pantry or cupboard is a perfect spot, as long as it isn't near a source of heat like a stove, an oven or a heating duct.
- Your kitchen counter could be okay, too. Again, as long as your herbs won't be exposed to heat or direct sunlight.
- In the refrigerator? Yes, it's cool and dark in there. But ... when you take your herbs out of the fridge to use them, condensation forms inside the jar. That moisture can lead to mustiness and mold. To keep your homegrown teas pure and fresh tasting, don't store your dried herbs in the fridge!
handy items for preserving & storing herbs ...
Please Note: If you purchase one of these products, I may receive a small commission from Amazon. There is no extra cost to you. Because I value your trust in my recommendations, I only recommend products that I use or would purchase for myself or my best friend.

- Home ›
- Preserving & Storing Herbs
If you enjoyed this article and found it helpful, please click the "Like" button to let me know. Thanks!

New! Comments
Feel free to leave me a comment in the box below!